How I Turned a Man's Tie Into a Boy's Tie Without Using A Sewing Machine (Part 1)

I don't know about you, but I love a bargain and when I saw a decent little boy's suit on Zulily for a reasonable price, I snagged it even though it had a tie that certainly would not work for the weddings we are attending this year.

Cardinal red might be good for Christmas, but September? No. I wanted something snazzy in the gray, blue, or brown range and I found just the thing in my husband's closet. Don't you worry! Not only didn't he wear this particular tie, but I even got permission! Wife points for me.
 |
| Hey Hon? Can I cut up one of your ties? |
Here's the rundown of my process. (Sorry this is only half, I'll post the rest as soon as I can.)
Materials Needed
* Men's tie
* 14 inch zipper
* Hand needle and thread
 |
| Tie & Zipper |
The original tie from the suit had an interesting zipper neck. I decided to duplicate it.


At first I thought I might be able to use the narrow end of the tie, but it was too narrow and when I tried to make it wide, the creases wouldn't iron out. I decided to use that portion of the tie for the hankie.


(I removed the old hankie, cut off the end of the new tie, and hand-sewed it into the pocket.)
To use the large end of the tie, I needed to make it smaller.
I opened up the seam, took off the tags & loop (saved them for later), and pulled out the felt/batting inside.


I put the original tie on the men's tie and traced the width so that I could cut down the felt to the right size.


If you do not have a tie to trace, I whipped up a rough diagram just for you!

After I cut down the felt, I calculated that I'd need about nine extra inches to make the knot (with some fabric to spare). I measured 9 inches past the top of the tie, cut down the felt (to 1 and 3/8ths inches wide), and chopped off the rest of the men's tie.


Then, I trimmed down the extra tie fabric on the sides, leaving enough fabric to fold over the middle portion of the back of the tie.


After trimming, it looked like this.

Next, I turned the raw edge under on one side and pinned it all of the way along the tie.


I repeated the process on the other side, overlapping the edges.

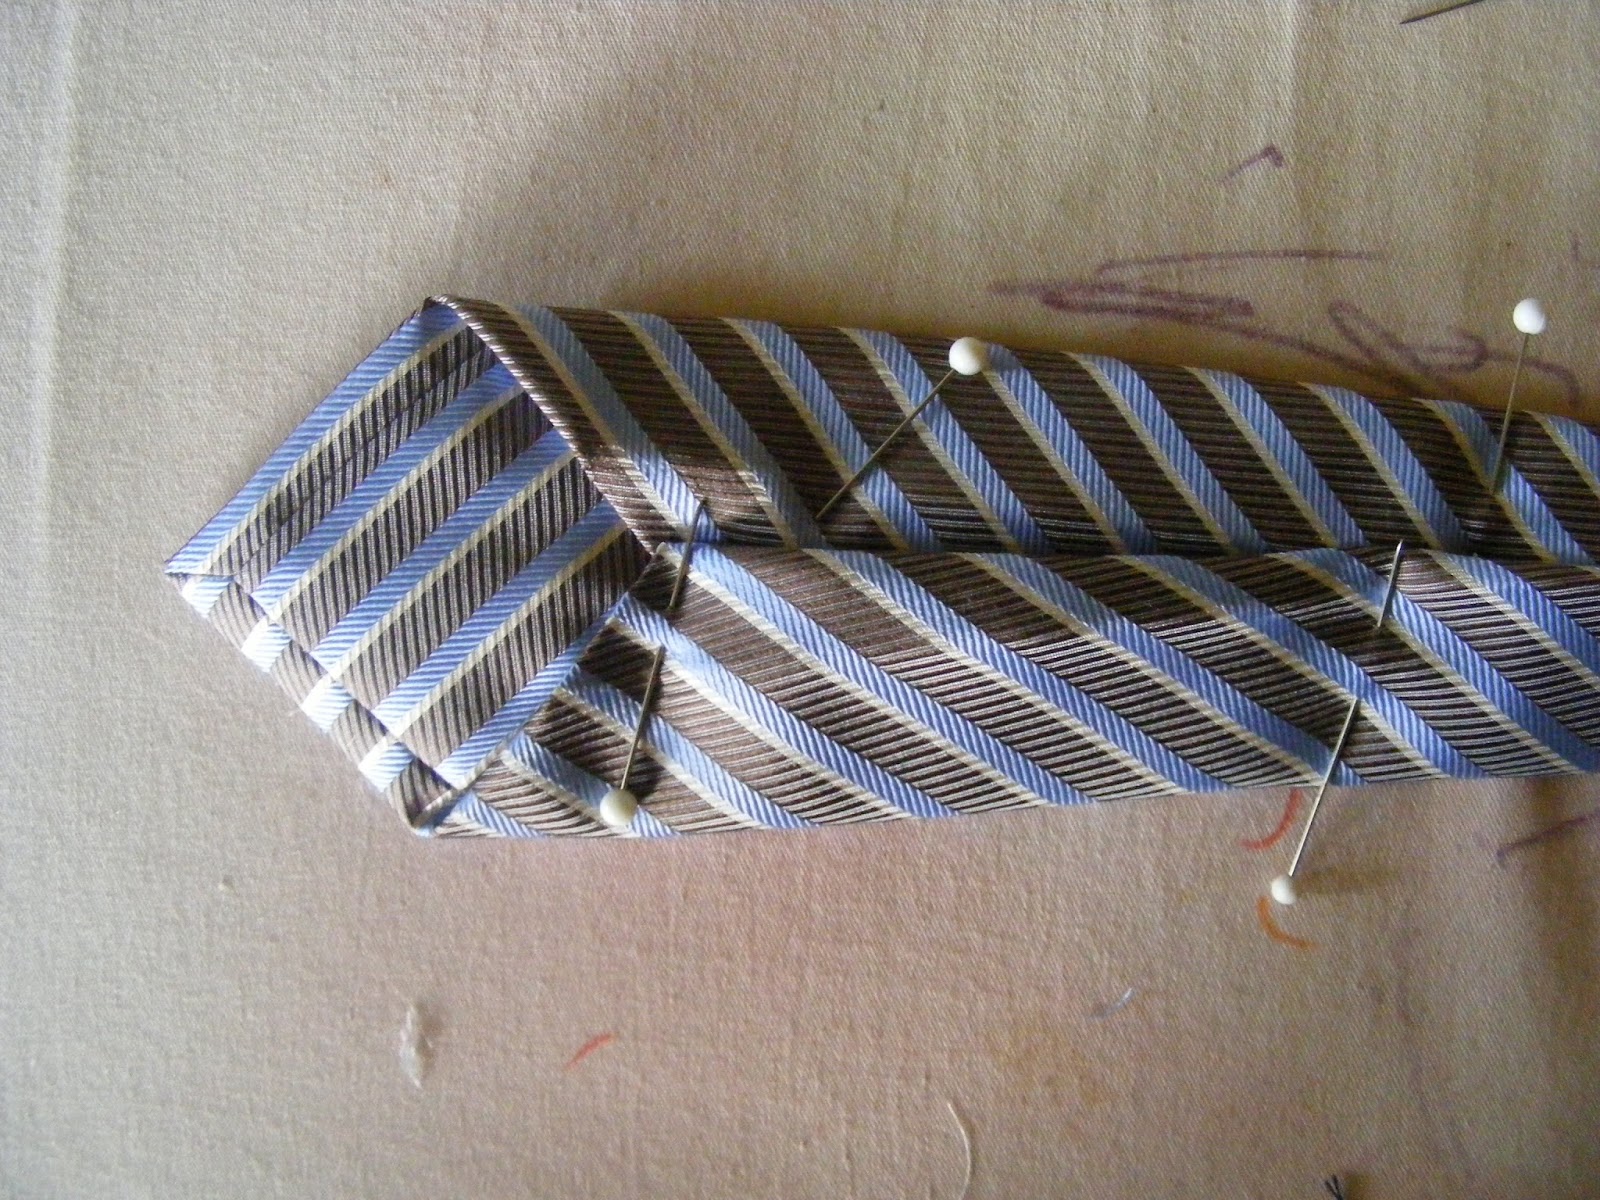
I checked the front to make sure I had a nice, even point.

Then, I whipstitched the back of the tie all of the way along the pinned edge.


Lastly, I took out the pins and pressed it as firmly as I could without damaging it.

Sadly, that's all I have to share for today! In Part 2, I'll show the rest of the process: how to make a loop with the zipper, "tie" the knot, and finish off the zipper.

See you soon! (Well, maybe next week at the earliest.)
~ Liz


Thanks, just what I needed for a wedding in August! JR
ReplyDelete